Honey Oatmeal Bread
 If you are looking for a new kind of bread to make, Honey Oatmeal is an excellent choice. I like to try different kinds of bread and when I saw this recipe on Brown Eyed Baker, I moved it right up the list of new recipes to try. It came out so wonderful that I made a double batch the next day. My son, Jack, especially loved it. The sweetness from the honey is subtle, but adds magnificent flavor to this almost whole grain loaf. The oats and the whole wheat flour add healthful benefits and pair nicely with the honey.
  Honey Oatmeal Bread
recipe adapted from King Arthur Flour Whole Grain Baking
Ingredients:
1¼ cups (10 ounces) boiling water
1 cup (3½ ounces) old-fashioned rolled oats
2 tablespoons (1 ounce) unsalted butter, cut into 3 pieces
1½ teaspoons salt
¼ cup (3 ounces) honey
1 cup (4 ounces) whole wheat flour
1-2/3 cups (7 ounces) all-purpose flour
¼ cup (1 ounce) nonfat dry milk
2 teaspoons instant yeast
Directions:
 Place the boiling water, oats, butter, salt and honey into a medium bowl. Stir, and let the mixture cool to lukewarm.
 Mix the remaining dough ingredients with the oat mixture, and knead – by hand, mixer or bread machine – until you’ve made a soft, smooth dough.
 Place the dough in a lightly greased bowl, cover it, and let it rise for 1 hour; the dough should be doubled in bulk.


Lightly grease a 9×5-inch loaf pan. Gently deflate the dough – it’ll be sticky, so oil your hands – and shape it into a 9-inch log.  Place it in the prepared pan. Cover it gently with lightly greased plastic wrap, and allow it to rise until it has crowned 1½ inches over the rim of the pan, about 1 to 1½ hours.
  Play with your kiddos, take a nap, fold some laundry or shovel your driveway. Near the end of the bread’s rising time, preheat the oven to 350 degrees F.
Uncover and bake the bread for about 45 minutes, tenting it with foil after 20 minutes to prevent over-browning. The bread is done when it’s golden brown and an instant-read thermometer inserted in the center registers 190 degrees F. Remove it from the oven, and after a minute or so, turn it out onto a rack. Brush with melted butter and sprinkle with additional oats. Cool the bread completely before cutting it.
 Slice thick and serve with dinner. Your family will love it, and you.
 See that smile?
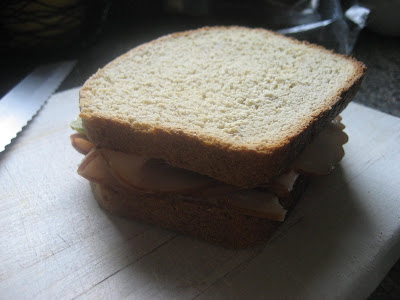 Or toast it up and make a wonderful sandwich.
 Delicious.
Place it in the prepared pan. Cover it gently with lightly greased plastic wrap, and allow it to rise until it has crowned 1½ inches over the rim of the pan, about 1 to 1½ hours. Play with your kiddos, take a nap, fold some laundry or shovel your driveway. Near the end of the bread’s rising time, preheat the oven to 350 degrees F.Uncover and bake the bread for about 45 minutes, tenting it with foil after 20 minutes to prevent over-browning. The bread is done when it’s golden brown and an instant-read thermometer inserted in the center registers 190 degrees F. Remove it from the oven, and after a minute or so, turn it out onto a rack.
Brush with melted butter and sprinkle with additional oats. Cool the bread completely before cutting it. 
 Slice thick and serve with dinner. Your family will love it, and you.
 See that smile?
 Or toast it up and make a wonderful sandwich.
 Delicious.
Any way you eat this bread is great. Any way you slice this bread is great Any time you eat this bread, it tastes great.
Enjoy.


This has all the ingredients I look for in bread...whole grains, milk (to complete the protein), natural sweeteners, and a big "YUM!" factor. I'll be trying this soon.
ReplyDeleteThat looks wonderful! I will definitely be trying this very soon! We LOVE all kinds of bread in our house, thanks!
ReplyDeleteBread looks amazing, but those two boys melt my heart! :)
ReplyDeleteThat sandwich looked DELISH and made me want to make bread right now, at 11:45 p.m.
ReplyDeleteI better go to bed and stop blog hopping. Thanks for sharing a fun recipe though!
Thanks for sharing! I have everything to make this! I may try it this afternoon! YAY! By the way, I am visiting from the homemaking link-up. Have a great day! God bless!
ReplyDeleteThis is seriously our most favorite bread! You will all have to let me know how yours comes out, and if your family loves it too!
ReplyDeleteThanks so much for stopping by & linking up with "Simply Homemaking Tuesdays." So glad you stopped by! Our family loves all kinds of bread too! We enjoy Honey Wheat Oatmeal Bread. Great pictures of the process! Come back and visit. Loved having you!
ReplyDelete{esther}@Our Simple Country Life
You make this look so easy!
ReplyDeleteI am def going to try this, thanks!!
Sarah beth
I'm a newbie at bread making and most of my attempts have not turned out great... but I think I'll be giving this one a try! It looks so good!
ReplyDelete(hopping from Raising Homemakers)
Andrea as you know I am a novice and have now made this twice and it doesn't seem to rise as much as it should. I just re-read the directions; seems like when I printed it out the part about letting it rise first for an hour then rolling it out and back into a roll got cut off. After it rose for the first time I didn't roll it out like you did then "re-roll" it up. Everything else was the same. Do you think that would account for why it doesn't look as good as yours? Its still hot and I haven't tried to eat it but it just look as "big" as yours. thanks for any advice :)
ReplyDelete